It doesn't get much better than this Spiced Pear Loaf! Unlike any other baked good out there, this recipe is perfect for winter.
Jump to RecipeThe Best Sweet Loaf Recipe
There are few things better than a warm baked good fresh out of the oven. The cozy flavors that fill your home with an irresistible aroma is just the cherry on top of baking sweets. And that's only one reason to try out this recipe! This loaf yields a sweet flavor with hints of cinnamon and pieces of fresh pear just waiting to be eaten. Pair this gluten-free loaf with your morning coffee for the perfect breakfast!
If you're a beginner baker or new to gluten-free baking, this is the ideal recipe to try out! Not only is it easy to make but the step-by-step instructions guarantee you'll make the perfect loaf. The end result is a deliciously sweet and moist baked goods that's full of warm, comforting flavors. Your friends and family will never believe this loaf isn't store-bought! It's truly that good.
This recipe also provides a great excuse to utilize pears from your local market and take advantage of the fresh produce while they're still in season. Discover the distinct flavors of the wide variety of pears, and learn which type is the best option to use for this recipe. After this recipe, you'll have a new appreciation for pears and the delicious baked goods that they're featured in!
Difference Between a Loaf, Bread and Cake
You may be wondering, "What's the different between a loaf, bread and cake?" To begin with the easiest and most simple differentiation, we will start with a loaf and bread. The two terms are very interchanged with only one primary distinction. The main difference is that a loaf refers to the whole bread, rather the shape. Hence, a "loaf pan" or "loaf of bread". A loaf is often a rectangular shape. A loaf pan can vary in shape and mold or decor style. While, the term bread refers to the piece sliced from the loaf.
Now, cake is a whole other story. First, bread and cake are often differentiated by their taste. Bread is commonly associated with being savory, while cakes are sweet. Second, bread may be an everyday staple, but cake is often reserved for special occasions. Ultimately though, the difference comes down to the science of making cakes or bread. According to WildGrain, cakes have a much softer texture that bread because "a solid fat is creamed with sugar"- the solid fat here being butter. Finally, bread also uses a leavening agent to rise, which drastically changes its consistency compared to cakes that use baking soda or baking powder.
Despite these differences, the terms "loaf" and "bread" lack much distinction. As well, the term "loaf cake" is often used to describe cakes baked in a loaf pan. So, why is this recipe called a loaf? While we could call it a loaf cake, this recipe more closely resembles a traditional sweet loaf. Although it uses similar ingredients to that of a cake, it doesn't have the same rich consistency. The texture more resembles that of pumpkin bread or this blood orange loaf. In conclusion, this pear loaf is just a sweet bread baked in a loaf pan!

Why Use Pears in Baked Goods?
Pears naturally have a soft texture for their exterior and interior! They are most known for their subtle sweet taste. And those sweet notes only become a tad more exaggerated when baked. As the compounds of the pears breakdown in the oven, their sweet flavor will become more prominent. This sweetness spreads thorough the whole baked good that the pear is in. As well, pears become extremely soft when baked; which, makes them even more irresistible!
Pears are often under utilized compared to other fruits. When it comes to baking, fruits like apples, cherries, or blueberries are used by the dozens! Rarely do we think about pears. Why is that? Pears are most often eaten raw, but seldom used in baked goods. Unfortunately, this is because pears are much more perishable and softer than apples. Not only do they have a shorter shelf life, but they also bruise much easier. When fruits are damaged, it makes people less inclined to purchase them. And when fruits or other products are less popular, the demand for them decreases along with their production value.
It's time for pears to have their chance to shine though! While their softer texture may cause them to bruise easier, it's also what makes them so delicious! They're so many ways to utilize them, both in baking and cooking. From adding them to a Radicchio Salad to serving them as an appetizer, like this Gluten-Free Pear and Walnut Tart recipe, there's countless ways to take advantage of fresh pears during their peak season.
The Perfect Pear
Much like apples or oranges, there's a variety of pears available. But some pears are better enjoyed fresh than baked in loaves. As well, not all pears are in season at the same time. It's always helpful to do a little research before heading to the grocery store. This will ensure that you're picking the right type of pear for the recipe.
Here is my quick breakdown of the three most common pears and the flavor profiles of each!
- Anjou pears: These egg-shaped pears come in green or red hues. They're in peak season around late fall or early winter. While they're mild in flavor, they have a firm texture that holds up well for cooking, baking, or even grilling.
- Bartlett pears: This type is the most well-known pear variety in the United States, and the one you're probably most familiar seeing at grocery stores. These pears have a signature round bottom and longer top. They are very juicy and have a soft flesh that makes them the perfect snack.
- Comice pears: The least known of the three pears featured here, the Comice pears are distinct thanks to their rotund body and short but well-defined neck. Referred to as the Christmas pear, they have a fruity aroma and flavor with a finer-less grainy texture.
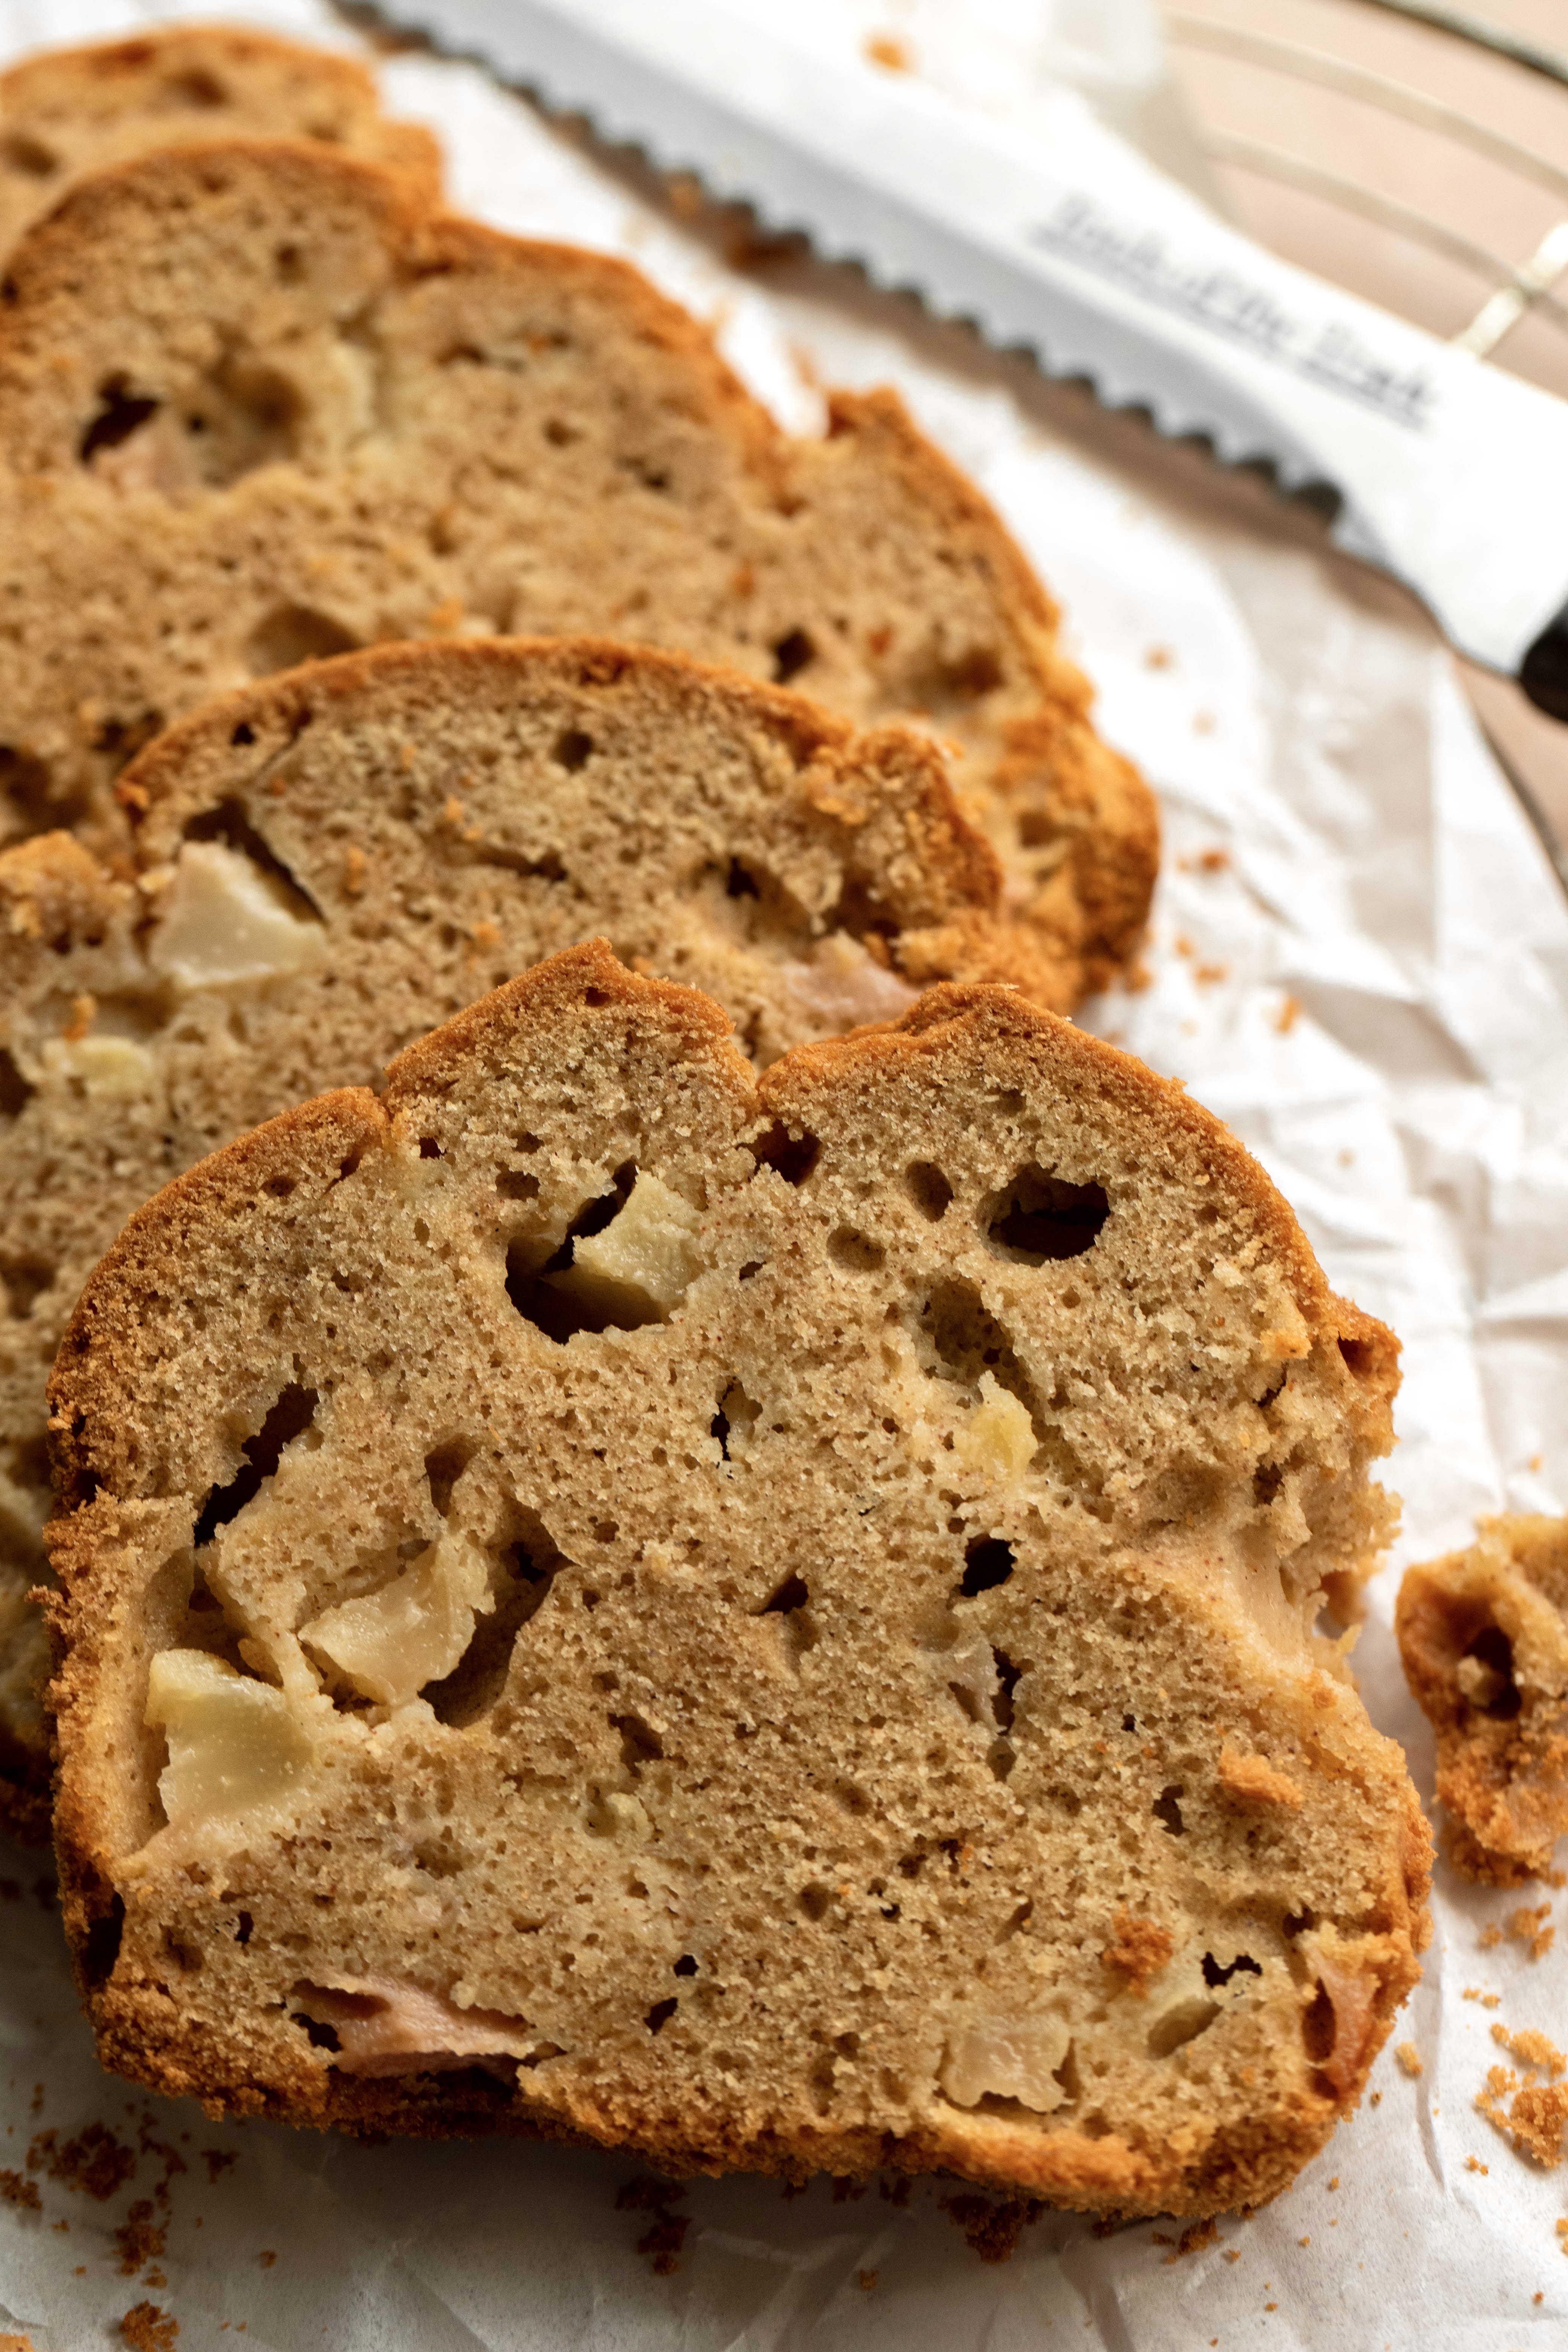
For this recipe, the red Anjou pear is the pear-fect choice! With its firmer texture, it's able to withstand being baked for an hour while still keeping its texture. When baked, it softens to the perfect consistency that's ideal for this recipe. Plus, its mild flavor allows it to take on the flavor of spices beautifully.

Time to Bake This Loaf!
Now that we know what type of pear to use for this recipe, it's time to get to baking! First thing's first, preheat the oven to 375 degrees Fahrenheit. Next, grease a rectangular bread loaf pan. I like to add a bit of coconut oil or butter to the pan, then dust it with gluten-free flour. This helps prevent the loaf from sticking to the pan. You can also grease the bottom and sides, then line it with parchment paper and secure the edges with metal clips. This option makes removing the loaf so easy! No more worrying about the loaf sticking to the pan!
Then, I like to prepare my dry ingredients so that they're ready to go when needed. In a medium-sized bowl, add two cups of gluten-free baking flour. My favorite is Bob's Red Mill Gluten-Free 1-to-1 Baking Flour. This flour has the perfect constituency and keeps baked goods intact. Next, add two teaspoons cinnamon, one teaspoon of baking powder, one teaspoon nutmeg, half a teaspoon salt, and one fourth teaspoon of baking soda. Mix with a fork, then set to the side. The combination of cinnamon and nutmeg here will compliment those sweet notes of the pears beautifully.
In another bowl, use an electric mixer to cream together three fourths cup of softened unsalted butter and three fourths cup cane sugar. This base will create a creamy, smooth texture to build off of. Mix together on a medium-low speed for about two minutes. Once smooth, add three room temperature eggs and one teaspoon of vanilla extract. Mix again on low speed to incorporate the ingredients before adding the dry ingredients. I like to add half the dry ingredients at a time, then mix between. This ensures a more even texture and flavor throughout the whole loaf.
Add the Pears & Bake
After combining the wet and dry ingredients, it's time to incorporate the pears. While I typically prepare the majority of ingredients beforehand so that they're ready to go when needed, I wait to prep the pears until it's time to add them to the batter. This ensures that they're at their freshest. As we know, pears tend to brown quickly once peeled. Waiting to peel them until it's time to incorporate them is an easy step that's worth a few minutes of hitting pause.
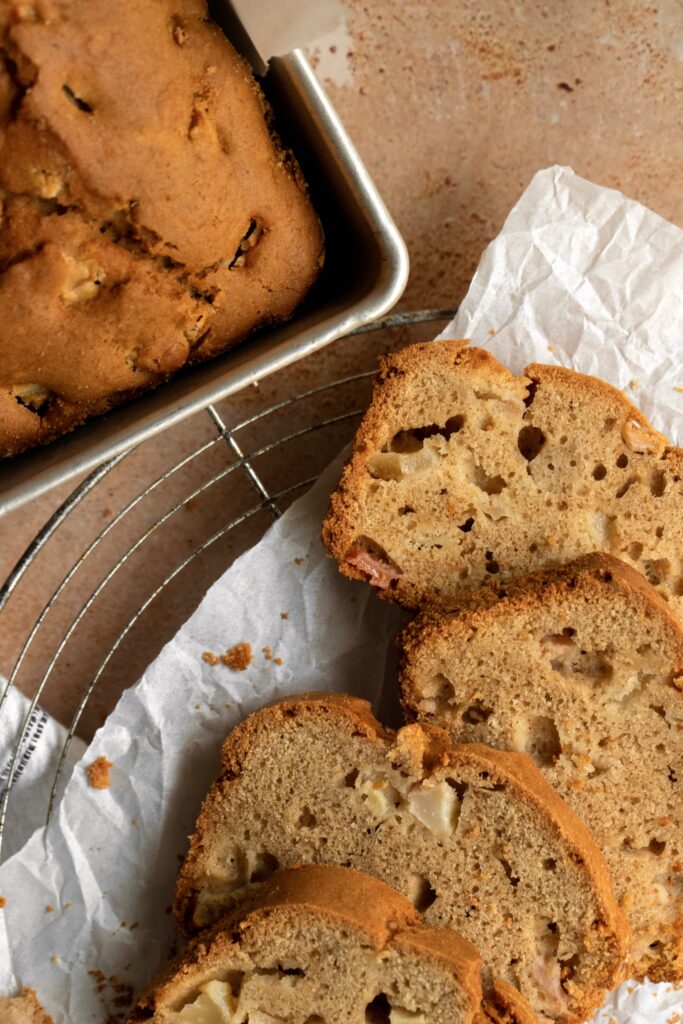
Start by peeling the skin off of two pears. Then, slice the pears into bite size pieces. Add the pears to the batter and use a spatula to fold in. We use a spatula instead of the electric mixer to avoid bruising the pears. Folding them in with a spatula allows us to disperse the pear throughout the batter, while keeping the integrity of the pears intact. Finally, pour the batter into the prepared baking pan. Smooth the top with the spatula, then place in the preheated oven on the center rack.
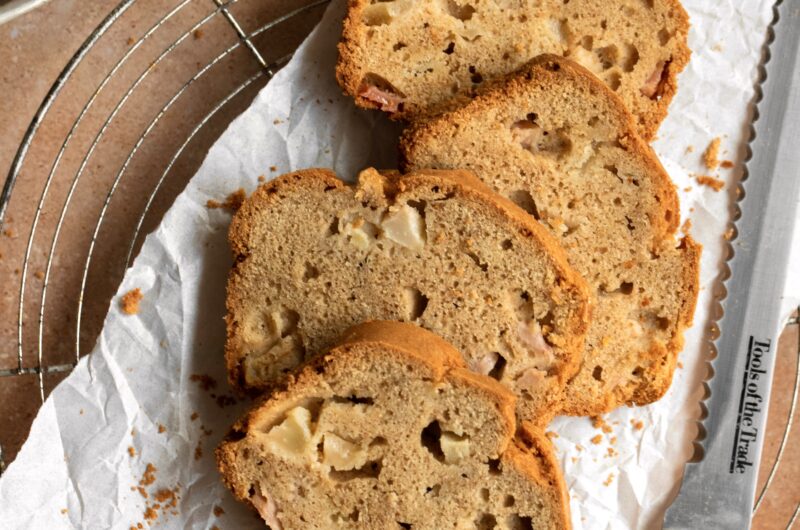
The gluten-free pear loaf will bake in the oven for approximately one hour. Once the top is golden brown and the inside is baked thoroughly, remove and allow to cool in the pan for roughly ten minutes. To check if the loaf if thoroughly baked, stick a toothpick in the middle. If the toothpick comes out clean, then the loaf is done baking. If the toothpick comes out with some wet batter on it, then the loaf needs a few more minutes. To remove the loaf from the pan, run a clean knife along the edges of the pan then invert the pan and catch the loaf. Or if you lined the pan with parchment paper, simply lift the two sides of the paper to remove the loaf. Place on a wire rack to cool for about twenty minutes before slicing.
How to Serve and Store
Once the pear loaf has cooled to the desired temperature, it's ready to be enjoyed! This pear loaf is at its very best right after baking when it's still warm from the oven. Serve it with a cup of coffee or tea, and a scoop of ice cream if you'd like! One of the many great things about this recipe is that it can be enjoyed during any time of day! Whether you're serving it up for breakfast with a side of bacon or as an afternoon snack, there's never a bad time to enjoy this loaf.
To store this pear loaf, I recommend keeping it in an air tight container at room temperature. This preserves the texture and consistency of the loaf, while refrigerating it would actually dry out the loaf. To warm it up, simply place a slice on a microwave-safe plate and heat for 20-30 seconds. If stored properly, the loaf can be enjoyed up to five days after making it. We'll see if it lasts that long though with how tasty it is!
Other Recipes You'll Love
After such a quick and easy recipe, I am sure you're wanting more! I've rounded up some of my favorite pairings and other similar dishes to this Gluten-Free Spiced Pear Loaf. Here are a few of my go-to's:
- Coffee Cake: It doesn't get any better than this dairy-free and gluten-free coffee cake! This recipe features a soft interior with a streusel ribbon and crumbly topping that's finished with a drizzle of a homemade glaze. Whether you're enjoying a crumbly bite of coffee cake alongside your morning coffee or as a late night treat, there's no bad time to munch on this gluten-free and dairy-free delight.
- Cinnamon Rolls: Whether you're enjoying them on Christmas morning or a casual midweek breakfast, there's truly no bad time for cinnamon rolls. The pairing of the persimmon and pumpkin purees yields a bread that is moist, packed with fall flavor, and unlike anything you've tried before.
- Persimmon Pumpkin Loaf: This Gluten-Free Pumpkin and Persimmon Bread is so easy to make and comes together in less than an hour. One of the unique aspects of this recipe is it's a flavor combination of pumpkin and persimmons. The seasonal persimmon may not be a fruit you're overly familiar with. That being said, prepare yourself to fall in love with this beautiful piece of produce!
Any of these gluten-free baked goods make for the perfect sweet treat to enjoy! As well, there's plenty of other recipes to choose from on my blog.
Gluten-Free Spiced Pear Cake
Course: RecipesDifficulty: Easy8
servings15
minutes1
hourThis loaf is the perfect sweet treat to enjoy with your morning coffee!
Ingredients
2 cups of gluten-free baking flour
2 teaspoons cinnamon
1 teaspoon baking powder
1 teaspoon nutmeg
½ teaspoon salt
¼ teaspoon baking soda
¾ cup cane sugar
¾ cup unsalted butter, softened
3 room temperature eggs
1 teaspoon vanilla extract
2 Anjou pears, peeled and cubed
Directions
- Preheat the oven to 375F and grease a bread pan
- In a medium-sized bowl, combine the flour, cinnamon, baking powder, nutmeg, salt, and baking soda
- In another bowl, use an electric mixer to cream together the butter and sugar
- Add the eggs and vanilla extract, mix to combine
- Sift in the dry ingredients
- Fold in the pears with a spatula
- Pour the batter into the prepared baking pan
- Bake for 60 minutes, then allow to cool for 15 minutes in the pan
- Run a clean knife along the edges to release the loaf
- Cool on a wire rack for 20 minutes, then enjoy!
Notes
- Store in an air tight container for up to five days


Leave a Reply