It doesn't get much better than these gluten-free scones featuring chai almonds with a brown butter maple glaze! They're the perfect sweet treat to serve on cold mornings with a cup of tea.
Jump to RecipeThe Ideal Cozy Breakfast
These gluten-free scones might just be the motivation you need to get out of bed on a chilly fall or winter morning! Not only are they baked to perfection, but each bite is full of rich flavor. This sweet breakfast treat features delectable Chai Almonds from Santé Nuts and a brown butter maple glaze that you don't want to miss! Pair these scones with your morning cup of coffee or tea for the perfect pairing.

Scones: The Wonderful Tea-Time Snack
Scones are most commonly associated with Scotland, England, and Ireland. However, we aren't quite sure where they truly originated from! The oldest mention of scones comes from a Scottish poet in 1513. So, it's possible they originated in Scotland and the recipe then spread. But we do know that scones were originally made from oats! They were then shaped into a large round dough before being cut into four or six pieces and cooked over an open fire.
It was around 1840 where scones first became popular during tea-time. Anna, the duchess from Bedford, was the one who first popularized them! It started when she wanted a "light food" with her afternoon tea and was served scones. She loved them so much she ordered them every afternoon with her tea, thus creating the popular "afternoon tea" activity. Today, we have many variations of the scone. In today's recipe, we will be making gluten-free scones with chai almonds and a brown butter maple glaze on top. Truly the best light and sweet treat for the holidays!


Starting On The Gluten-Free Scones
Now that we understand the origins of scones, let's start on the recipe! Combine the flour, sugar, baking powder, nutmeg, and salt. For this recipe, we will be using Bob's Red Mill 1-to-1 Gluten Free Baking Flour. This flour yields the perfect consistency for the scones. As well, it already has xanthin gum in the blend, so no need to add more! Mix the dry ingredients together, then add the mixture to a food processor. We'll be using a food processor in the next step to combine the flour and butter.
At this point, we are now going to add in the frozen butter. Let's chat real quick about the importance of using frozen butter! The frozen butter stays cold until baking time, which will keep the scones from spreading out. Spreading out would mean your scones would lose flakiness and that perfect moist texture later in the baking process. So, do not use room temperature butter, or even refrigerated butter! You will yield the absolute best results for your gluten-free scones with frozen butter.
Add your frozen butter into the mixture by grating it in using a cheese grater. Grating the butter allows us to more evenly distribute it amongst the dry ingredients. Furthermore, the finer pieces of butter are easier to work into the flour; which, shaves time off the total recipe. Once all the butter is incorporated, pulse to combine until pea-sized crumbles form. Then transfer back into the mixing bowl you first started with and set aside.
The Benefit of Using Greek Yogurt
Now taking a separate bowl, whisk together the Greek yogurt, egg and vanilla extract. You might be wondering why we are using Greek yogurt instead of sour cream or buttermilk. While, it's pretty standard to use a sour cream or buttermilk in a dough recipe, those two ingredients are actually a bit too heavy for our desired scone's texture. Using a Greek yogurt will ensure the airy texture of your gluten-free scones.
So go ahead and whisk in that Greek yogurt along with your egg and vanilla extract! Then, pour the mixture into the dry ingredients with pea-sized butter crumbles. Use a spatula to fold in the wet ingredients to combine the two. Once thoroughly combined, it's time to fold in the chopped chai almonds.


The Best Part- The Chopped Almonds!
In this recipe we use the delectable Chai Almonds from Santé Nuts. So why the Santé brand? I have been using this brand's assortment of nuts for over 3 years now and have never been let down. Their nuts are made in small batches to ensure properly seasoned nuts. They make their nuts with real ingredients and they always have the perfect crunch! Ads well, they are a family owned company that has been in business since 2004!
I personally love adding a subtle crunch to a lot of different savory dishes and deserts. They are extremely versatile and Santé also sells a great variety of different nut flavors. If you are wanting to check them out and try some for yourself, or for the sake of this recipe, you code "BOTTOMLESSPIT" for 15% off your order! If you are in need of inspiration on how to best utilize their flavors, I've got a good amount of recipes including Santé nuts.
- Fudge: A butter fudge with candied pecans for the perfect holiday season treat! This recipe yields the most perfect fudge texture and crunch thanks to the candied pecans!
- Cookies: Gluten-free oatmeal and pecan cookies with the perfect amount of crunch to add to the sweetness. This recipe makes the most soft and perfectly sweet cookies with an added crunch.
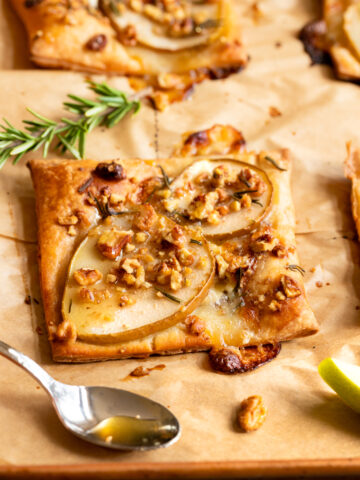
- Pear Tart: A gluten-free pear and walnut tart that yields the most perfect crunch. This pear tart recipe has the best sweetness to tart ratio with a beautiful walnut crunch to top it off.

Finishing Touches
Now that you have added your chopped chai almonds, it is time to spread out a large piece of plastic wrap and use wet hands to transfer the dough. Wet your hands again and shape the dough into a 6" disk that is roughly 1" thick. Wrap the plastic wrap around the dough and refrigerate for 30 minutes. Preheat your oven to 400 degrees and line a large baking tray with parchment paper.
With your dough now fully refrigerated, remove the plastic wrap from the scones and place on a lightly floured or greased surface. Use a clean knife to cut the dough into six even wedges. You can also use a pastry scrapper for more consistent wedges. Place the gluten-free scones on the prepared baking tray. Whisk together one egg and a tablespoon of water and brush the scones before sprinkling coarse sugar on top. Bake on the center rack for 18 minutes until golden. Remove from the oven and allow to cool for at least 20 minutes.

Brow Butter Maple Glaze- YUMM!
To give your scones their finishing touch, we are going to dive into making the brown butter maple glaze. This glaze is mouth-watering and oh so delicious! It has the perfect blend of fall flavors that pair beautifully with the chai almonds. Start by adding butter to a saucepan and melting over medium-high heat. Allow it to brown slightly, until it's golden brown and has a nutty aroma. Remember to stir as you go.
Remove from heat after about three minutes and strain through a colander. This removes any flecks of brown butter at the bottom of the melted butter. Furthermore, this allows for a smoother glaze. Whisk in the maple syrup and vanilla extract into the brown butter. Then, sift in the powdered sugar to break up any lumps. Once the gluten-free scones have cooled to room temperature, drizzle the glaze over the scones to create your finished product!

Serving and Storing
And just like that you have gluten-free scones! Scones can seem intimidating, but as we learned in this recipe, they're actually much easier to make than you'd expect. Just make sure to have the right ingredients and give the dough time to refrigerate. Then, you'll have perfectly baked scones ready to be devoured!
I like to make a batch of these gluten-free scones before family or friends come into town. It's the ideal breakfast to serve up during the holidays season and is always a welcomed surprise. Serve these scones with a cup of coffee or tea for the perfect pairing.
These gluten-free scones are super easy to store away if you have leftovers. Simply store them in either a bag or sealed container and in a dry area. When you are ready to enjoy them again, go ahead and pop them into a toaster oven or oven to re-heat them. Just avoid putting them in the microwave as it will change the consistency of the scones and melt the glaze.
Gluten-Free Scones with Chai Almonds and a Brown Butter Maple Glaze
Course: Pastry, Breakfast, BrunchDifficulty: Medium4
servings30
minutes40
minutes300
kcalDon't miss this perfect fall breakfast recipe! These gluten-free scones are just the baked good you need this holiday season to pair with your morning cup of coffee or tea.
Ingredients
1 ½ cups gluten free baking flour
¼ cup cane sugar
1 tablespoon baking powder
1 teaspoon nutmeg
½ teaspoon salt
8 tablespoons butter, frozen
½ cup chai almonds, chopped
⅔ cup greek yogurt
1 egg, room temperature
2 teaspoons vanilla extract
Egg wash
Coarse sugar for toppings
- Ingredients for the Brown Butter Maple Glaze
2 tablespoons unsalted butter
¼ cup maple syrup
⅓ cup powdered sugar
1 teaspoon vanilla
Directions
- Instructions for the scones
- Combine the flour, sugar, baking powder, nutmeg, and salt in a large mixing bowl. Then, add it to a food processor.
- Grate the frozen butter into the food processor. Pulse to combine until pea-sized crumbles form. Then, transfer back to the mixing bowl.
- In a separate bowl, whisk together the Greek yogurt, egg, and vanilla extract.
- Pour the mixture into the mixing bowl, use a spatula to fold in and combine with the dry ingredients.
- Once thoroughly combined, fold in the chopped almonds.
- Spread out a large piece of plastic wrap and use wet hands to transfer the dough. Wet your hands again and shape the dough into a 6" disk that is roughly 1" thick. Wrap the plastic wrap around the dough and refrigerate for 30 minutes.
- Preheat the oven to 400 degrees and line a large baking tray with parchment paper.
- Remove the plastic wrap from the scones and place on a lightly floured or greased surface. Use a clean knife to cut the dough into 6 even wedges.
- Place the scones on the prepared baking tray. Whisk together one egg and a tablespoon of water and brush the scones before sprinkling sugar on top.
- Bake on the center rack for 18 minutes until golden. Remove from the oven and allow to cool for at least 20 minutes.
- Instructions for the brown butter maple glaze
- Add the butter to a saucepan and melt over medium-high heat. Allow it to brown slightly, until it's golden brown and has a nutty aroma. Remember to stir as you go.
- Remove from heat and whisk in the maple syrup and vanilla extract. Then, sift in the powdered sugar.
- Once the scones have cooled to room temperature, drizzle the glaze over the scones.
Recipe Video
Notes
- Allow the scones to cool to room temperature before glazing, then allow the glaze to set before serving.


Leave a Reply