It wouldn't be the holiday season without sugar cookies! These delectable, gluten-free sugar cookies with icing are a must-make seasonal treat for Christmas!
Jump to RecipeGluten-Free Sugar Cookies for the Holidays
I'm sure almost everyone has fond memories from childhood that involve making sugar cookies with a loved one in your family. Helping measuring ingredients, mixing up the dough, rolling it out, and cutting out your cookie dough shapes. Of course, one of the best parts was being able to decorate your cookies and bring your imagination to life! Sugar cookies aren't just for kids to enjoy though. This holiday season, get in touch with your creative side or embrace your inner child by making this gluten-free sugar cookie recipe!
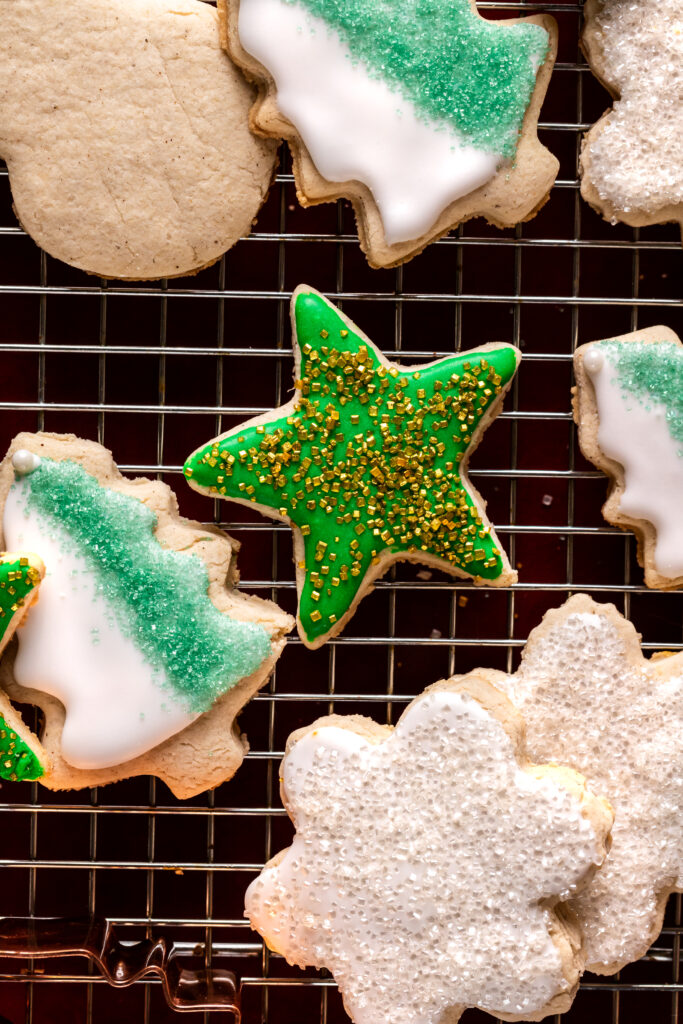
There's just something about the simplicity of gluten-free sugar cookies that makes them so irresistible! They are sweet, light, simple, and perfect for Christmas. As addicting as they are to consume, it is equally as fun baking and decorating them! With not much hassle, work, or time, these sugar cookies are arguably one of the easiest cookies to bake. All in all, they're the perfect sweet treat for the holiday season!
My gluten-free sugar cookie recipe yields the traditional taste that everyone craves during the month of December. I guarantee you won't be able to notice a difference in the taste or consistency of these gluten-free cookies compared to traditional sugar cookies. If you didn't bake them yourself, you wouldn't believe that they're actually gluten-free! These sugar cookies make for the perfect cookie to bring to a holiday gathering, easily bake with kiddos, or leave out for Santa on Christmas Eve. Even Santa Claus will be impressed with this recipe!
The Origin of the Infamous Cookie
Sugar cookies are a classic in our holiday treat repertoire, but what exactly is their origin? Sugar cookies actually date all the way back to the 7th century! It's believe that the stepping stone of the cookie recipe originated in Person. However, German Protestants who settled in Nazareth, Pennsylvania in the late 1700's are actually credited with creating the sugar cookies recipe that we know and love today. Pennsylvania actually adopted the Nazareth sugar cookie as the official state cookie in 2001!
The sugar cookie, or sugar biscuits, were usually formed in round or keystone shapes. Over time, many variations of this cookie developed across the United States. Today there are many different shapes and recipe alternatives, like this gluten-free recipe! But the basic ingredients of the sugar cookies remain the same. These ingredients include: sugar, butter, flour, eggs, vanilla, and either baking soda or baking powder.
It's no secret that sugar cookies are a Christmas staple, and for a good reason! These easy cookies are one of the more simple and straight forward sweet treats to bake during the holidays. This is one of the reasons it became so popular. During winter, people would visit loved ones and bring a simple gift. The sugar cookies was easy to make and quickly became a popular gift to give and receive. As well, this easy is easy to customize; which, makes it popular amongst children. These cookies are one of the best ways to get into the holiday spirit as you can make them as festive as your heart desires!
Creating a Gluten-Free Delight
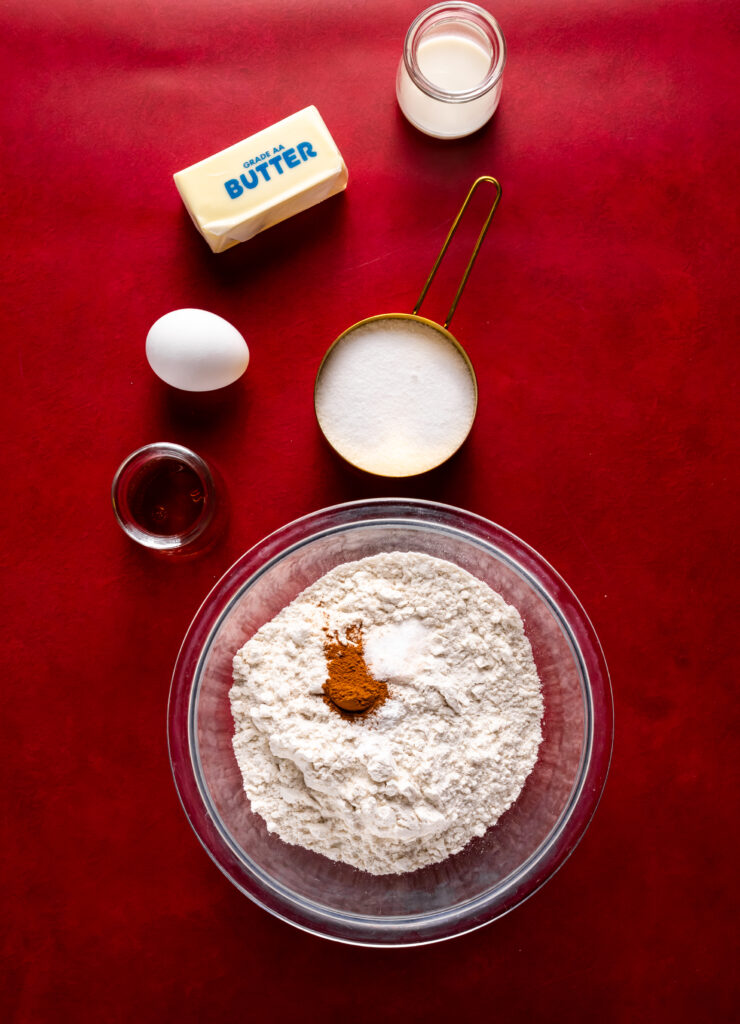
Sugar cookies require minimal ingredients to create a delicious result. Lucky for us, no additional ingredients are required to make this cookie gluten-free. All we need to do is swap the all-purpose flour for a gluten-free flour. I like to use the Bob's Red Mill 1-to-1 Gluten-Free Flour as it always yields a consistent outcome and perfectly mimics traditional flour. It will maintain the integrity of our gluten-free sugar cookies without compromising the texture or test. This is important because we want the sugar cookies to resemble the traditional recipe as much as possible.
The gluten-free flour will be the base of our dry ingredients. We will also be using cinnamon, salt, and baking powder. That's all we need! We don't even need xanthin gum as the Bob's Red Mill gluten-free baking flour already has xanthin gum mixed into the blend. Furthermore, we won't be using baking soda for this recipe because we want our cookies to rise instead of spread. Using a bit of baking powder is the perfect component to create fluffy, soft cookies. Finally, a touch of cinnamon is added to our dry ingredients to balance out the sweetness and make our gluten-free sugar cookies that much more flavorful!
In a medium-sized mixing bowl, combine all of the dry ingredients. Next, use a fork to mix the ingredients together. This helps ensure that all of the ingredients are evenly dispersed and creates for a better taste. Then, set your dry ingredients to the side in preparation for the next steps. I like to create my dry ingredient blend first so that I have it on hand. I find it's a simple step that helps every baking recipe go smoother and faster.
Sugar, Butter and More!
To create our blend of wet ingredients, we'll fist start by creaming together the sugar and butter. This is the first step in our process because we need to evenly disperse the sugar. This allows the sugar to be evenly absorbed and create a more consistent dough. As well, this will increase the volume of the dough as it forces more air into the dough; which, helps create a light cookie. For this recipe, we'll be using unsalted butter and cane sugar. Soften the butter, then add it a large mixing bowl with the cane sugar before using an electric mixer on medium-low speed for roughly two minutes. The end result should be a thick, creamy mixture.
After you have your butter and sugar perfectly creamed together, we are going to add the rest of our wet ingredients. This will include adding your egg, almond milk, and vanilla extract. The almond milk prevents our cookies from drying out and helps to keep them extra soft. As well, the vanilla extract is a staple baking ingredient that gives our gluten-free sugar cookies its signature taste. Mix again on low speed for one minute until all the ingredients are thoroughly incorporated and the dough is thinner. This is exactly the consistency we want before adding the dry ingredients to thicken it.

Creating The Dough
Now, it's time to combine our dry and wet ingredients. Add one third of the dry ingredients at a time, and make sure you mix between on low speed to incorporate the ingredients. This will help to evenly combine the ingredients, as well as create a most consistent dough. As tempting as it is to simply dump all of the dry ingredients in, I highly discourage this. If we were to add all of the dry ingredients at once, it would be difficult to evenly mix it into the wet ingredients. The result could be a dough that is either too thick, or has a "flour" taste to it. Mixing in sections will resolve any of those issues.
So, after repeating mixing in one third at a time, you should be left with a thick dough that is ready for chilling. This recipe requires that you refrigerate the dough for roughly one hour. There's two purposes to chilling the dough. One, it will actually help to improve the taste of your cookies! The second and most important, your dough will bake more evenly after it has been chilled. Refrigeration time allows the dough to set, making it easier to roll and yielding a better bake. One hour in the fridge and you'll have cookies with crispy edges and a soft, chewy middle. The perfect gluten-free sugar cookie if you ask me!
Make sure to preheat your oven to 350 degrees Fahrenheit during the last 20-30 minutes that the dough is in the refrigerator. Then, line two large baking sheets with parchment paper. By the time your cookies are ready to go, the oven will be nice and hot! Finally, dust a work surface with gluten-free flour and having a rolling pin ready to go. We use the flour as a barrier to prevent out dough from sticking to anything. This makes it a whole lot easier to manipulate the dough as well without it tugging and ripping.
Creating Our Gluten-Free Sugar Cookie Shapes
After the allotted chill time, it is time to roll it out! Remove the cookie dough for the refrigerator and place it on your prepared workspace. I like to divide the dough in half, then set the other half to the side. Trust me, trying to roll out the entire thing will take a lot more energy that doesn't need to be wasted! Dust half the dough with a little more flour to prevent the dough from sticking to the rolling pin. Then, roll out your dough until it's roughly a quarter to a half an inch thick. If the dough begins to stick to the rolling pin, just simply sprinkle a little more flour over the top.
Once your dough is rolled to the desire consistency, it's time for the fun part! Use your cookie cutters to cut out your shapes from the rolled out gluten-free sugar cookie dough. Then, transfer your shapes to the prepared baking sheets. I like to use a spatula to help me with the part as it makes the transfer process so much easier. I then like to re-roll all of the discarded dough and repeat the same cutting process to provide even more cookies. We don't waste good dough here! Then, you can move onto the other ball of dough. After you have all your cookie cut outs, there's only one thing left to do... bake!

Baking The Cookies
Luckily, baking these gluten-free sugar cookies takes no time at all! All you need is less than ten minutes and you'll have perfect golden cookies. Like any cookie, it's easy to overtake these treats if you don't set a time or watch carefully. Just one to two minutes can lead to burnt cookies with overly crispy edges. Unless you're a fan of crisp cookies, let's avoid that! So, here's my tips and tricks to baking the perfect cookies!
- Ensure the oven is preheated to 350 degrees Fahrenheit. Putting the cookies in before the oven is at the right temperature can result in an uneven bake.
- Place only one baking sheet in at a time. I know it's easy to want to bake all the cookies at once to be done faster, but let's avoid that. The cookies on the lower rack will bake at a different speed than the ones on top, which can lead to burnt cookies.
- Make sure you put the baking sheet on the center rack. This will provide an even bake as the heat is the most distributed at this spot.
- Bake for only 9 minutes! The cookies may not look fully done when you pull them out of the oven, but remember that they will continue to bake for a few minutes while on the baking sheet. This is the prefect "sweet spot" of bake time for these delicate cookies!
Follow these four tips and I guarantee you'll have perfect gluten-free sugar cookies every time! Now, just a few more steps before we can enjoy these desserts!
Allow The Cookies To Cool
Once your gluten-free sugar cookies have cooled to room temperate on the baking sheet, it's time to transfer them to a wire rack. Use a spatula to carefully place them on a wire rack to cool for at least one hour. If you avoid letting them cool, your icing will melt off the cookies and you'll be left with a disappointing mess. We've all been there before where we're just too eager and had to learn that lesson the hard way. It's so easy to get caught up in moving onto the next step without realizing what crucial steps you may be missing!
So, to create the best outcome and the best looking cookies, let them cool! This will allow the icing to properly set on the cookies and harden. This way you are allowed to create intricate designs and play around with different colors! If you start icing without cooling, all of your cool colored icings will muddle into one and you will lose what you just worked for. Trust me, I know we just want to get to the fun part, but all good things come to those who wait!

Mixing Up The Icing
The icing recipe is even easier to make than the cookies! It's the perfect compliment to our gluten-free sugar cookies! To start, take a medium sized bowl and sift in the powdered sugar. We sift our powdered sugar to ensure we get an even consistency without lumps. You'll notice that powdered sugar often balls up and is inconsistent in texture. So, to avoid those clumps, sifting in the sugar first will ensure we get a silky, smooth icing.
Next, combine the vanilla extract, corn syrup and water in a small bowl. Whisk together to combine. Whisking these ingredients before adding it to the powdered sugar helps create that even texture. Once those have been mixed, we can now add in the sifted powdered sugar. Slowly, stir the dry and wet ingredients together. If needed, use a fork to help break down the sugar. Continue to stir until the icing forms. If it is still too thick, add half to one tablespoon of water to the bowl. This will help thin it out.
If desired, you may add food coloring into your icing here. You can separate portions of icing out and dye it up! This is a fun way to create super festive gluten-free sugar cookies. It also is a fun activity to do with kids! To decorate your cookies, transfer the icing to a piping bag. If you do not have a piping bag lying around, you may use a ziplock bag! Just load in the icing to each ziplock back and cut off a small portion of one of the bottom corners to allow the icing to dispense. If you cut your corner too thick, your icing will be less intricate. Depending on your desired outcome is how you can measure how much to cut from the corner of the ziplock bags!
How to Store The Cookies
After you ice your cookies, let them sit unstacked for at least four hours. However, I'd recommend six to eight hours if you can. If you stack the cookies on top of one another too soon after icing, you risk ruining your beautiful designs. The icing needs time to harden and set. Allotting enough time for this process ensures that the icing won't stick to other cookies. Just remember that they still need to be stored in an air tight container or they'll go stale faster.
Luckily, these gluten-free sugar cookies are just as easy to store as they are to make. You've probably guessed it already, but just placing them in a ziplock bag or air right container in a dry, room temperature space is all they need. These cookies will last you up to a week, so you can continue to enjoy them for days to come! I can't even count the amount of times I continue to snack on these wonderful treats until they're all eaten! I guarantee you that you and your family will do the same!
Other Cookie Recipes You'll Love!
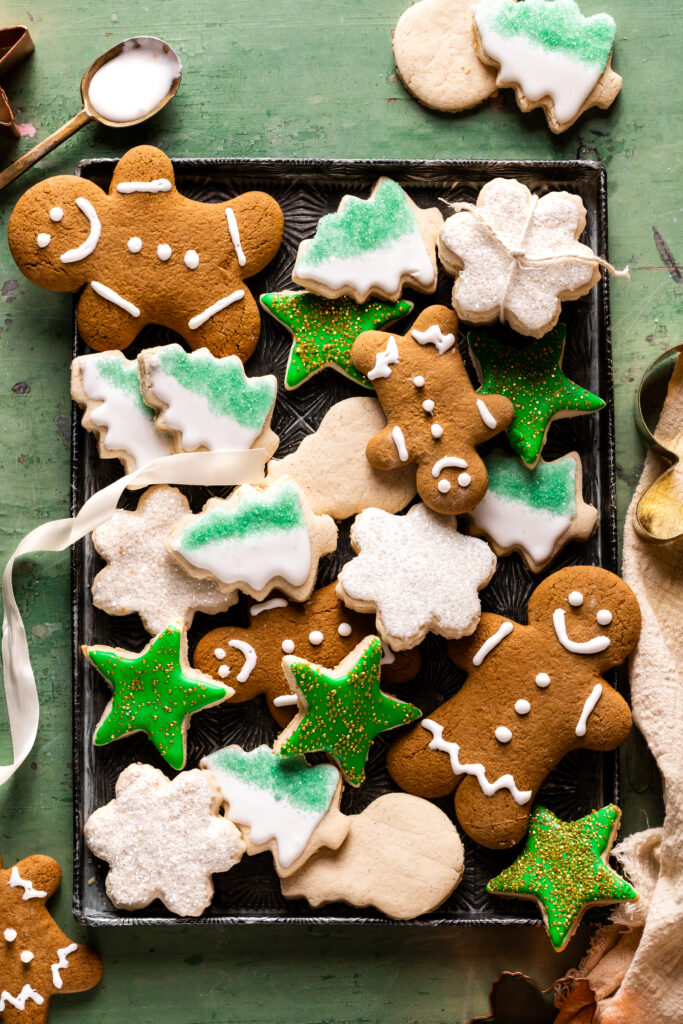
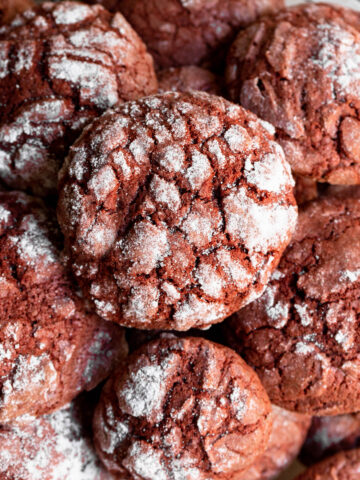
If you enjoy this cookie recipe, here are a few more that are equally delicious during the holiday season! All of these recipes are also gluten-free, and one is also dairy-free and refined sugar free! These delicious sweet treats are perfect for the holiday season. But two of them aren't only for Christmas time and can be made year round! I wonder which recipe will be your favorite...
- Gluten-Free Soft Brown Butter Snickerdoodle Cookies: These Brown Butter Snickerdoodle Cookies are so soft and delicious that you won't even be able to tell that they're gluten-free! These cookies have an irresistible consistency with a slight crisp around the edges and a pillowy middle. Not to mention, the nuttiness of the brown butter adds so much flavor to this sweet treat!
- Paleo Raspberry Thumbprint Cookies: If you're looking for a paleo dessert that is easy to make and delicious, this cookie recipe is for you! These thumbprint cookies are dairy-free, gluten-free and refined sugar free. Plus, they feature a homemade raspberry jam and a dark chocolate drizzle to create the perfect bite. This recipe is very straight forward and yields a result so delicious that friends will be shocked that there's no refined sugar or butter!
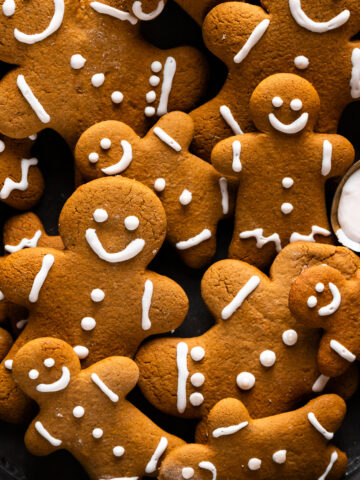
- Gluten-Free Gingerbread Men with Maple Syrup: Looking for a perfect holiday cookie recipe? These delectable Gluten-Free Gingerbread Men are a must-make treat for the Christmas season! These cookies have the perfect texture and consistency. The only thing better than their texture is their flavor! The traditional molasses combined with maple syrup yields a warm, cozy taste to these gingerbread men.
If you're looking for the perfect holiday dessert box to bring to parties, I recommend making two to three of these gluten-free recipes! This ensures that there will be at least one cookie that everyone will love and creates for a beautiful spread.

Gluten-Free Sugar Cookies
Course: DessertCuisine: AmericanDifficulty: Easy15
servings15
minutes9
minutes1
HourThese sweet holiday treats are the perfect easy cookie to make with loved ones!
Ingredients
- Ingredients for the Cookies
2 ½ cups gluten-free baking flour
½ teaspoon ground cinnamon
½ teaspoon baking powder
¼ teaspoon sea salt
¾ cup cane sugar
½ cup unsalted butter, softened
1 large room temperature egg
1 tablespoon almond milk
1 teaspoon vanilla extract
- Ingredients for the Icing
3 cups powdered sugar
1 teaspoon vanilla extract
2 teaspoons light corn syrup
4 tablespoons water
1 drop food coloring of choice, optional
Directions
- Instructions for the Cookies
- Combine the gluten-free flour, cinnamon, salt, and baking powder in a large bowl. Mix, then set to the side.
- In another bowl, cream together the sugar and butter with an electric mixer for two minutes on medium-low speed until thick and creamy.
- Next, add the egg, almond milk, and vanilla extract. Mix for one minute on low speed until thoroughly incorporated.
- Then, slowly, add the dry ingredients. Add one third of the dry ingredients in at a time, mixing between on low speed to combine. Repeat until all of the dry ingredients have been added and the dough is thick.
- Once combined, refrigerate for one hour. During the last 20-30 minutes of chill time, preheat the oven to 350 degrees Fahrenheit and line two baking sheets with parchment paper.
- Take the cookie dough out of the refrigerator and sprinkle flour on a wooden cutting board or countertop to prepare your surface to roll out the dough.
- Divide half the dough and place on the prepared surface. Add a sprinkle of flour over the dough, then roll the dough out until its ¼" - ½" thick using a rolling pin.
- If the dough begins to stick to the rolling pin, sprinkle a little more flour over the top.
- Next, use your cookie cutters to cut out the shape in the sugar cookie dough. Then, transfer the cutouts to the prepared baking sheets using a spatula.
- Reroll the discarded dough, add a bit more flour to the dough, and repeat until you've used all of the cookie dough.
- Bake the sugar cookies on the center rack for 9 minutes before allowing to cool for at least one hour on a wire rack.
- Instructions for the Icing
- Sift in the powdered sugar into a medium-sized bowl.
- Next, combine the vanilla extract, corn syrup and water in a small bow. Whisk together, then add to the powdered sugar.
- Slowly, stir the dry and wet ingredients together. Use a fork to help break down the sugar.
- Continue to stir until the icing forms. If it's still too thick, add ½-1 tablespoon more water to the bowl.
- If desired, add your food coloring and stir to combine. To decorate your cookies, transfer the icing to a piping bag or a small ziplock bag withe the tip cut off.
Recipe Video
Notes
- Store in an air tight container or large ziplock bag up to one week in a dry, room temperature space.

Leave a Reply